

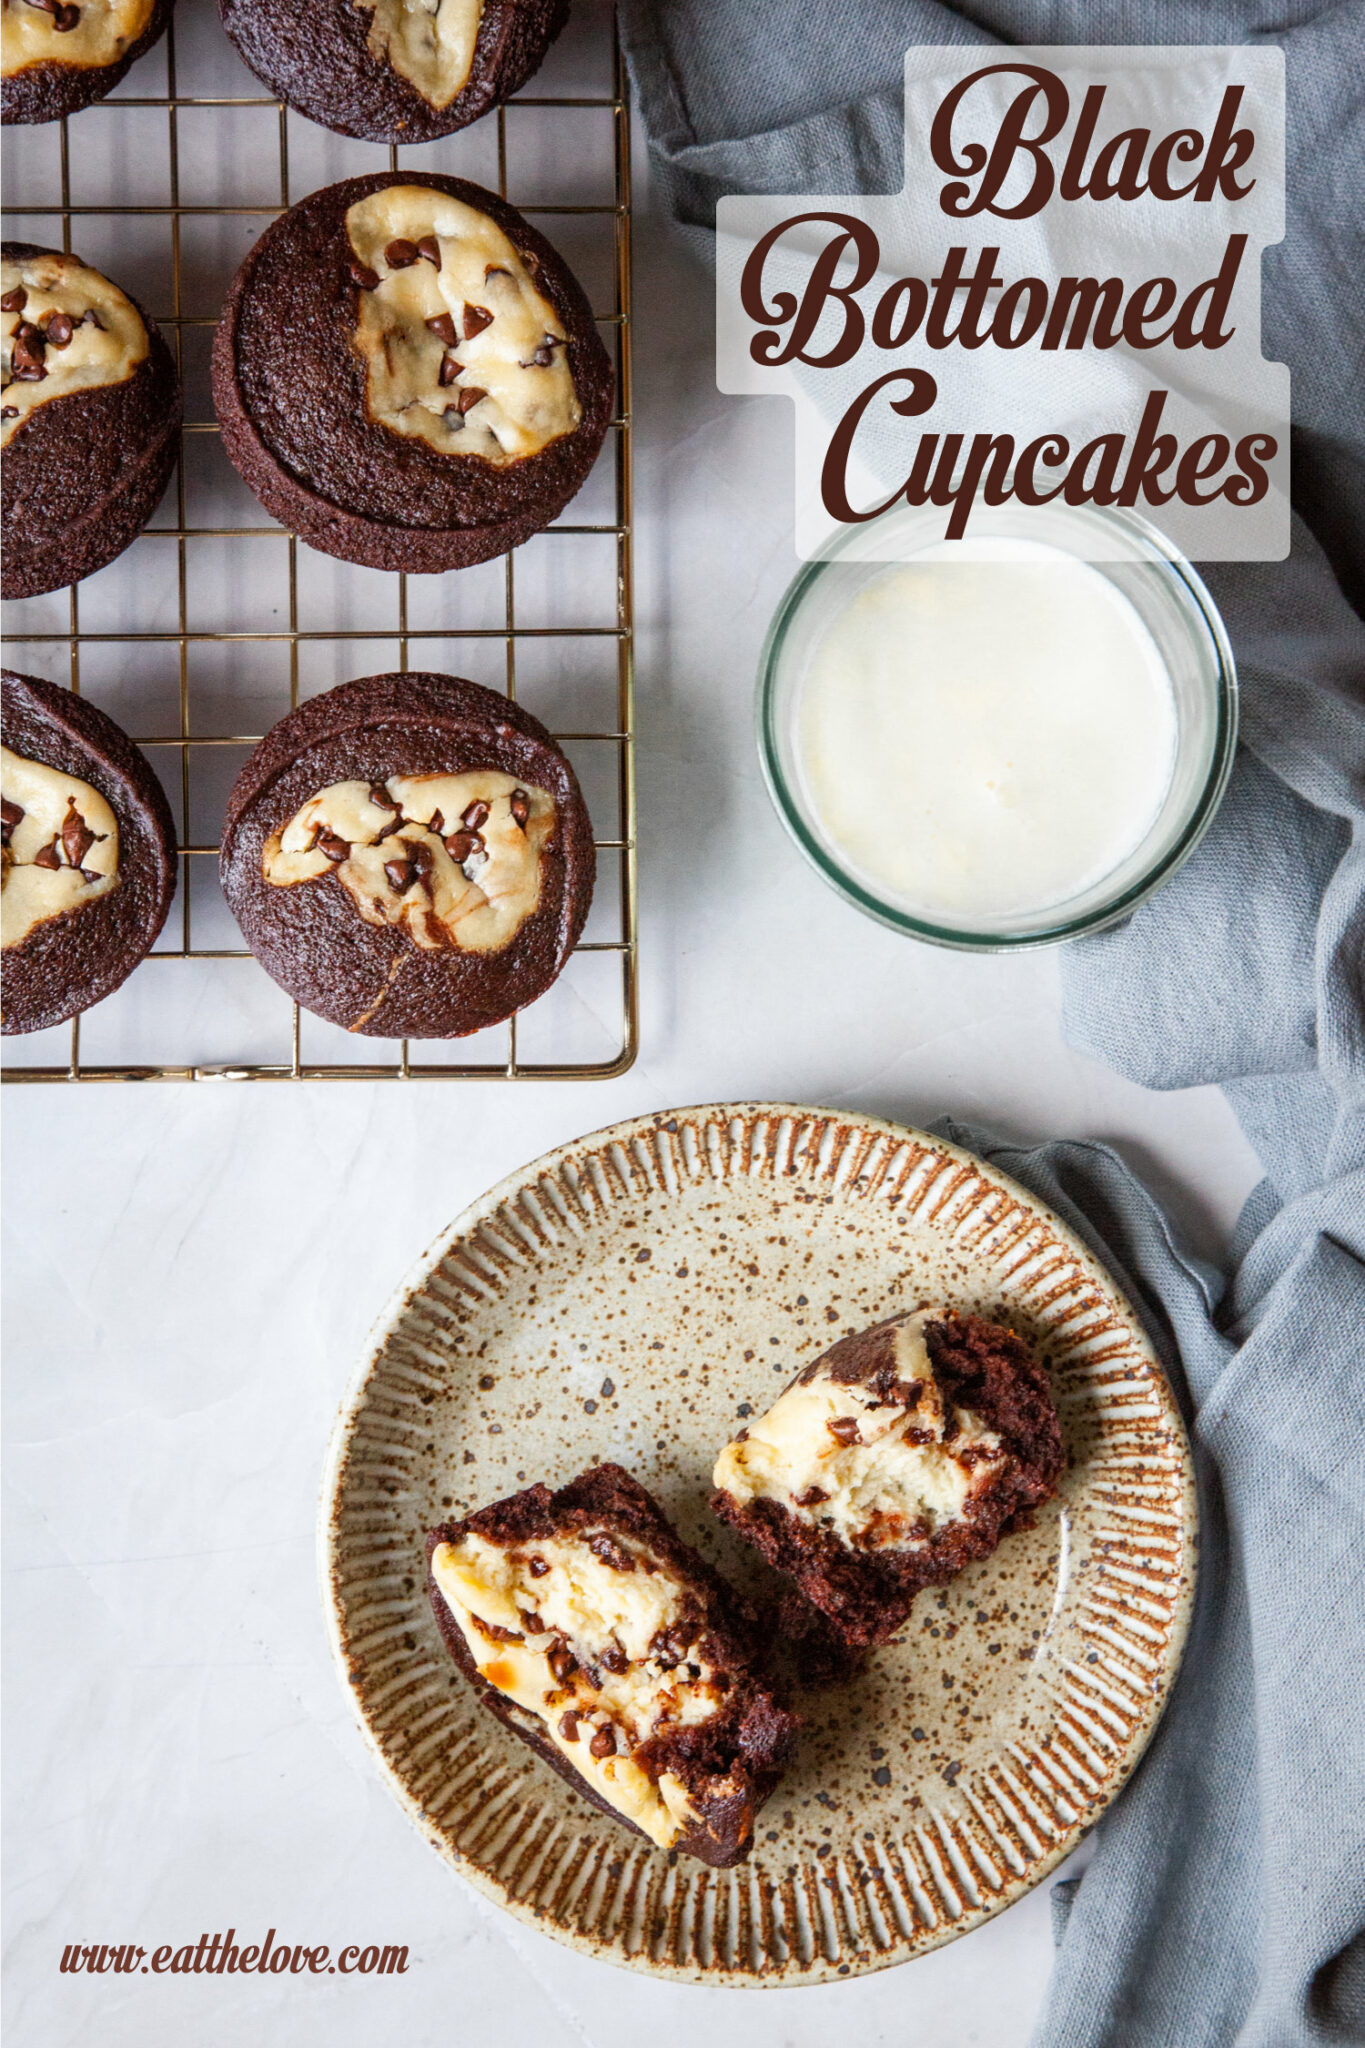
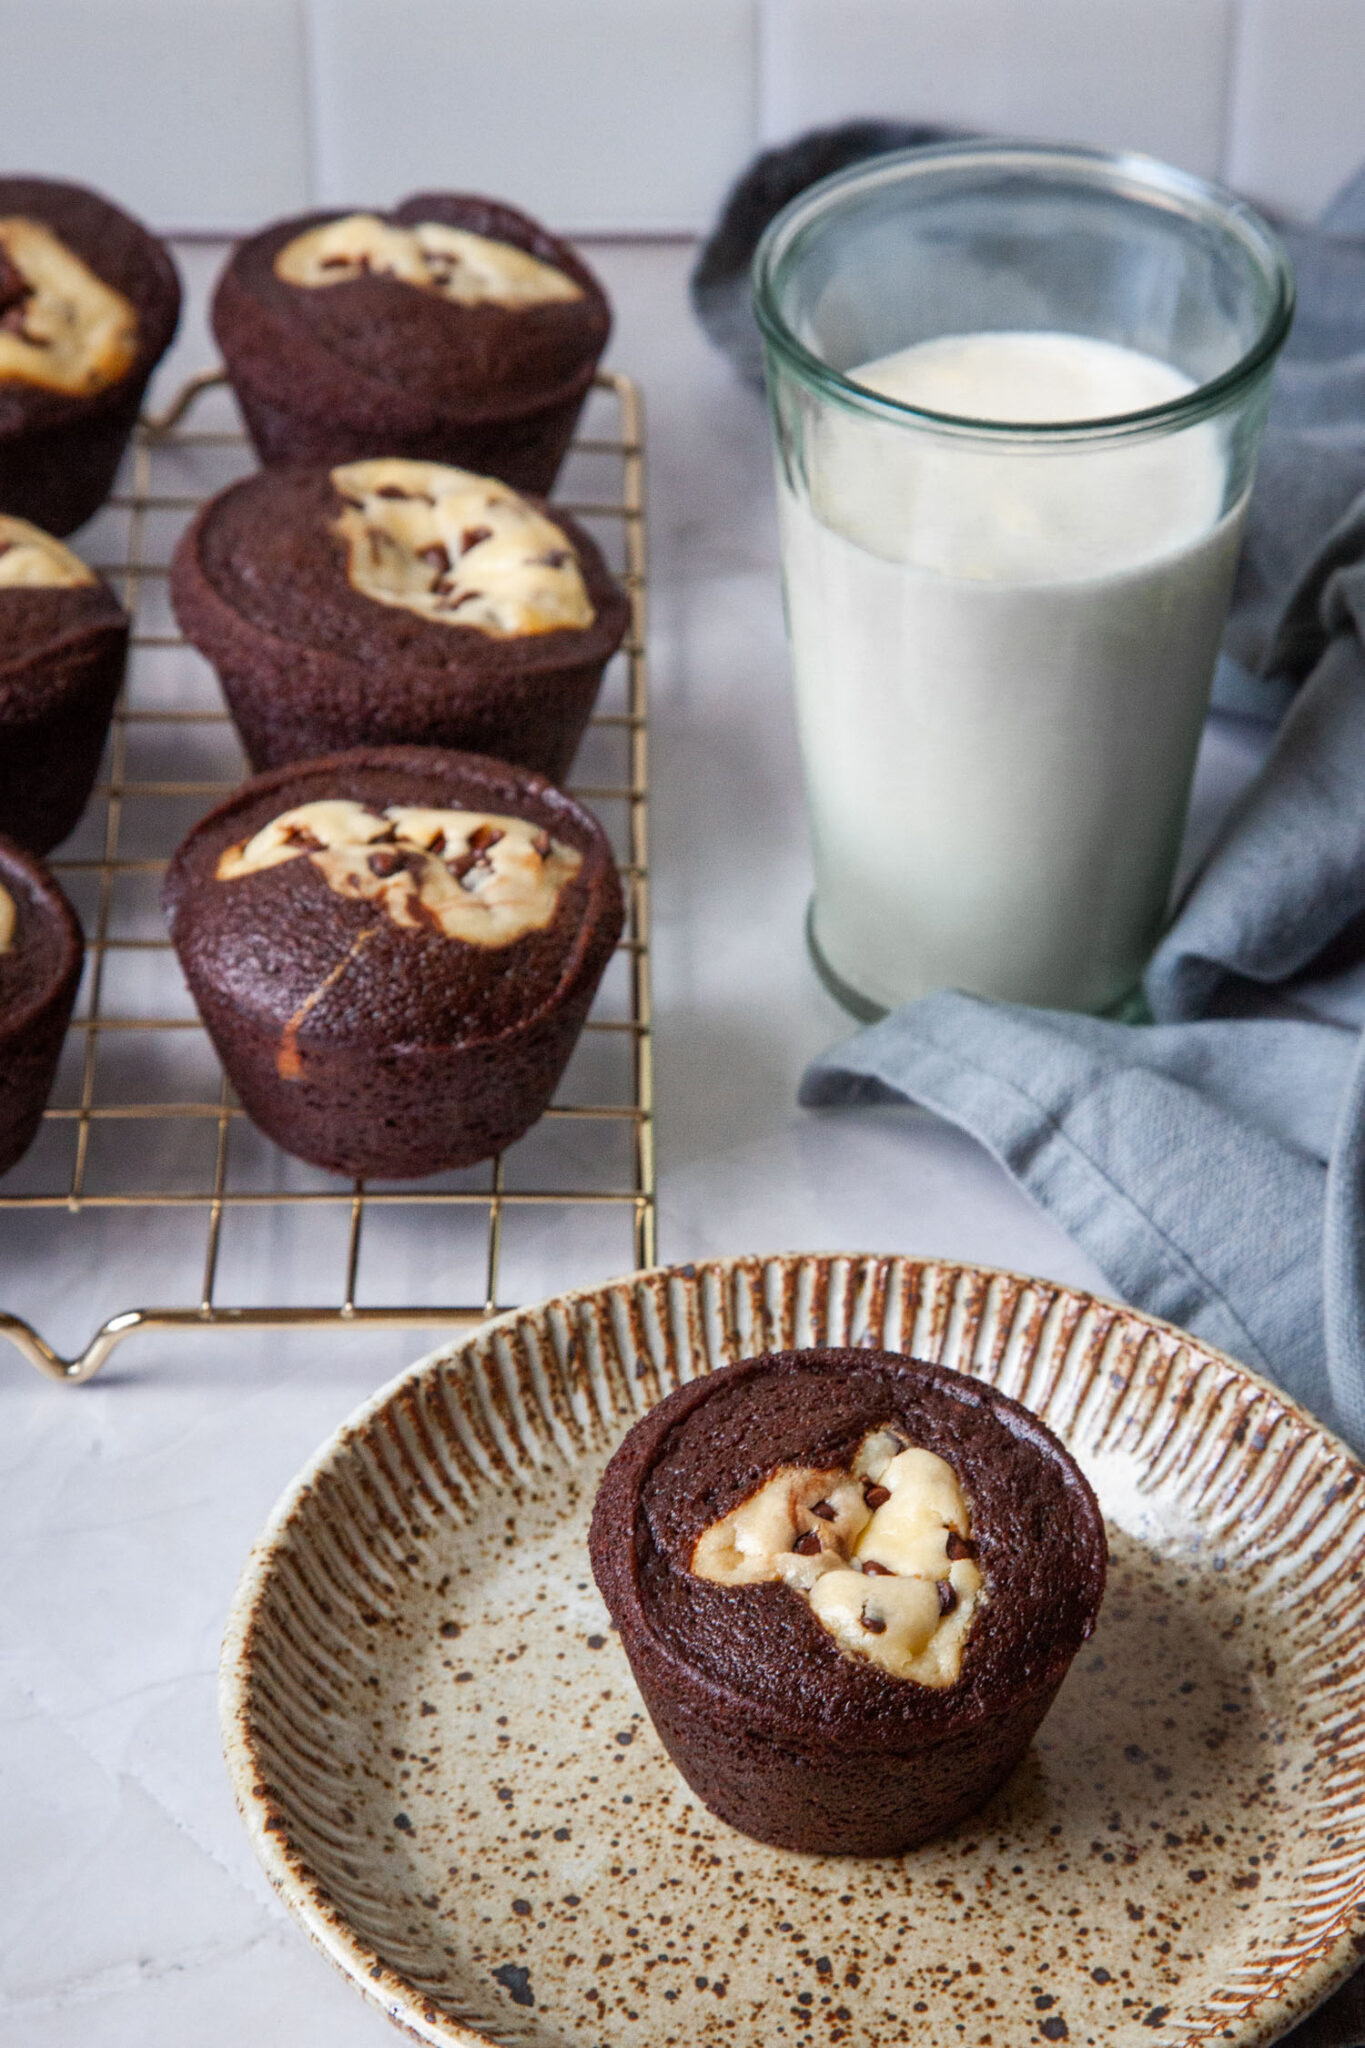
These old-fashioned black bottomed cupcakes are a rich and fudgy treat with a cream cheese filling. They are surprisingly easy to make!
Jump to Recipe
Years ago, I came across black bottomed cupcakes in David Lebovitz’ The Great Book of Chocolate (<-affiliate link), a small book that is surprisingly packed with tons of awesome recipes (it introduced me to Congo Bars) and loads of information about chocolate. I made black bottomed cupcakes back then and loved them, but I only recently rediscovered them again, tinkering with the original recipe to make the recipe my own.
Black bottomed cupcakes are an old-fashioned vintage cupcake, one that yields a super-rich and fudgy cupcake base with a “built-in” frosting made of cream cheese. If you’re a fan of deep and fudgy chocolate baked goods, like my easy fudge brownies, my miso caramel soy sauce brownies, rainbow cheesecake brownies, chocolate crackle cookies, or Texas-sheet cake, you have to try these cupcakes!
How to make black bottomed cupcakes
Though the look fancy-pants, these cupcakes are super easy to make. And because they have a built-in sweetened cream cheese filling, they don’t require frosting!
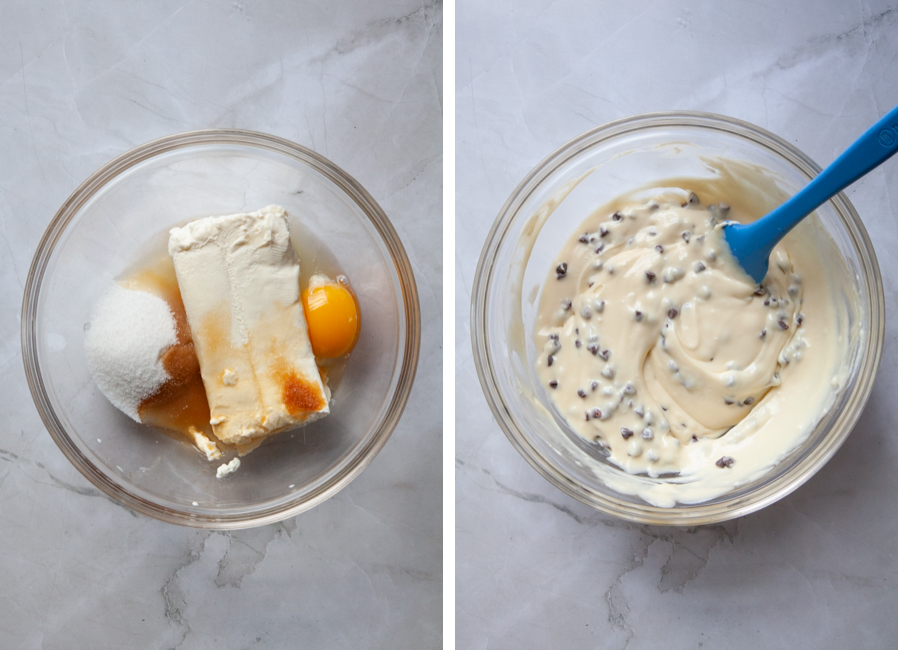
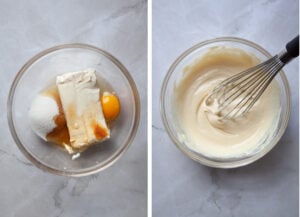
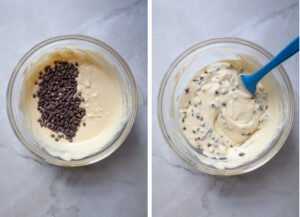
First make the cream cheese filling by combining room temperature cream cheese, sugar, and an egg. Fold in mini chocolate chips, then set aside.
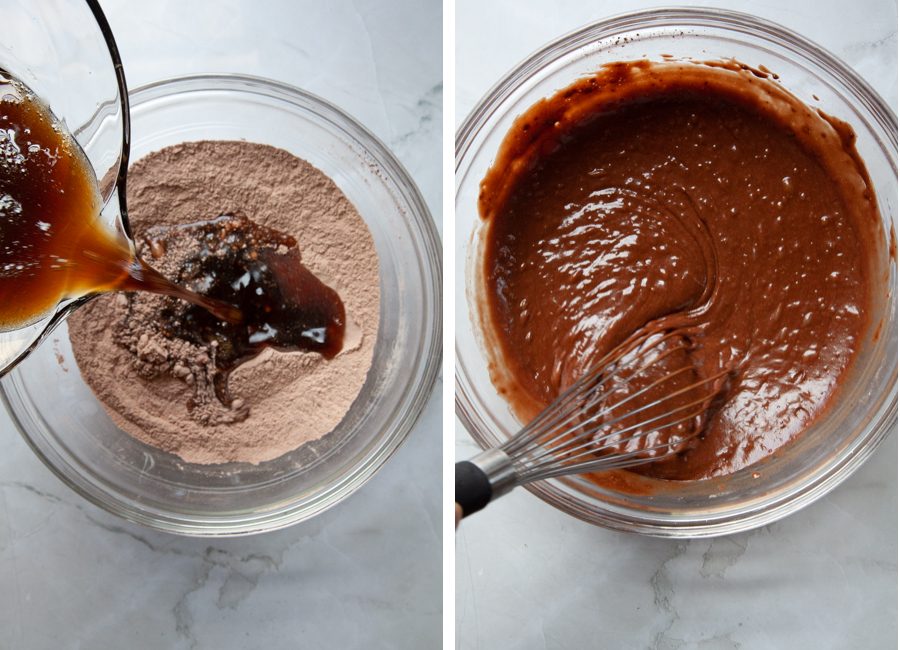
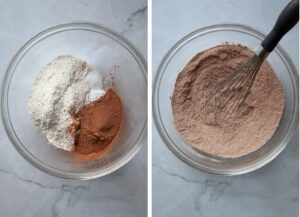
Make the cupcake batter by combining flour, natural cocoa (not Dutch-processed), baking soda, and salt in a bowl. Combine fresh brewed coffee, brown sugar, vegetable oil, Balsamic vinegar, and vanilla extract in a bowl. Then pour the liquid into the dry ingredients. Whisk the ingredients together until they are combined and a smooth batter forms.
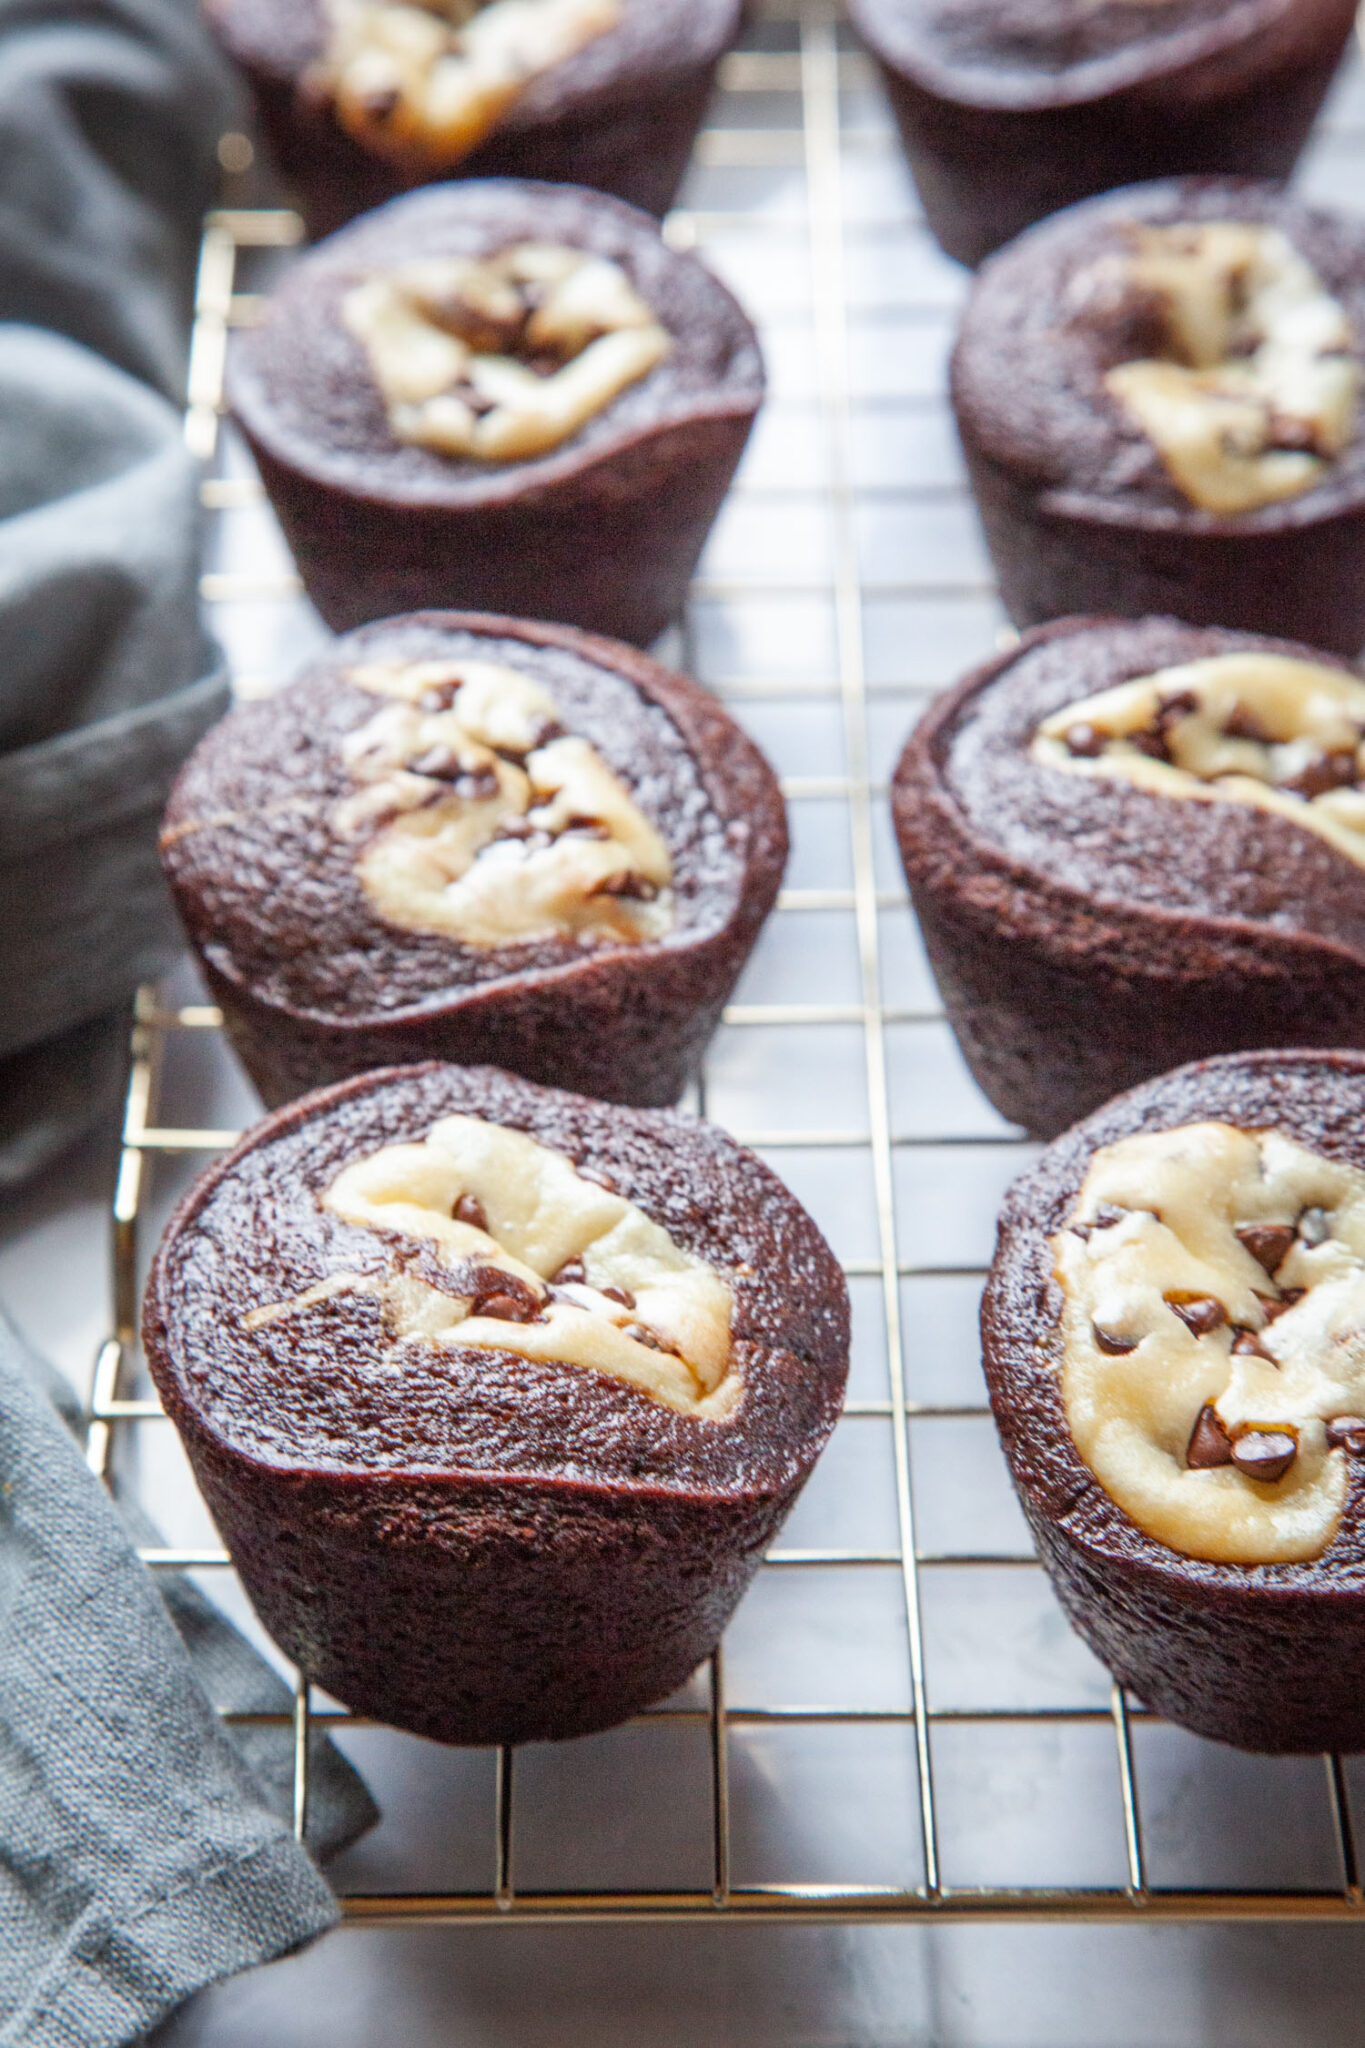
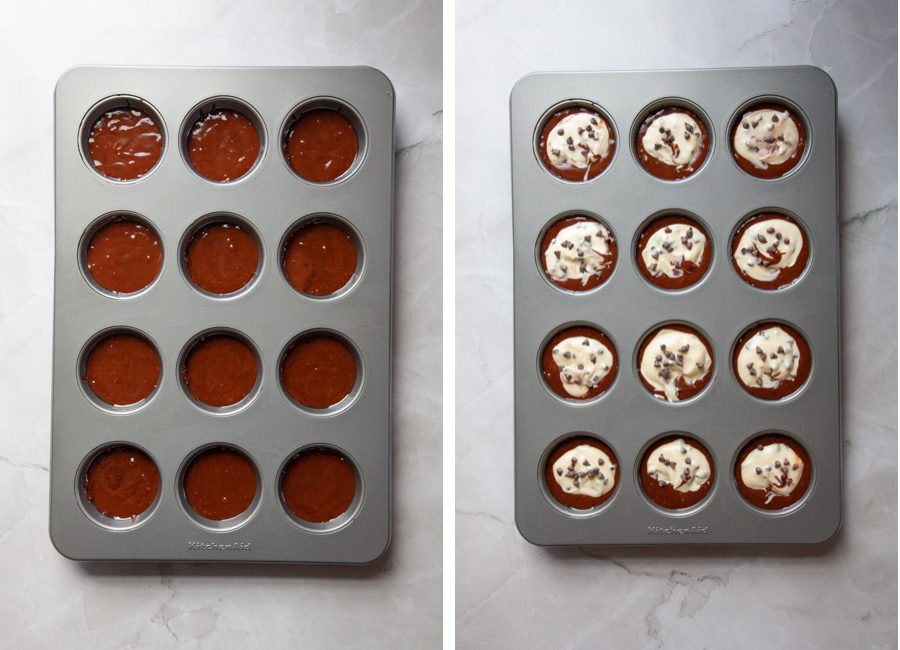
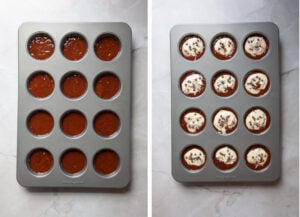
Divided the batter into a standard muffin pan, either well oiled, or fitted with cupcake lines. Then spoon a generous amount of cream cheese filling into the batter. Sprinkle a few more chocolate chips on top and bake.
Warming up the cream cheese
To ensure that you cream cheese filling is smooth, you need to use room temperature cream cheese. The easiest way to do this is to just take your cream cheese out of the fridge and place it on the counter for an hour or two.
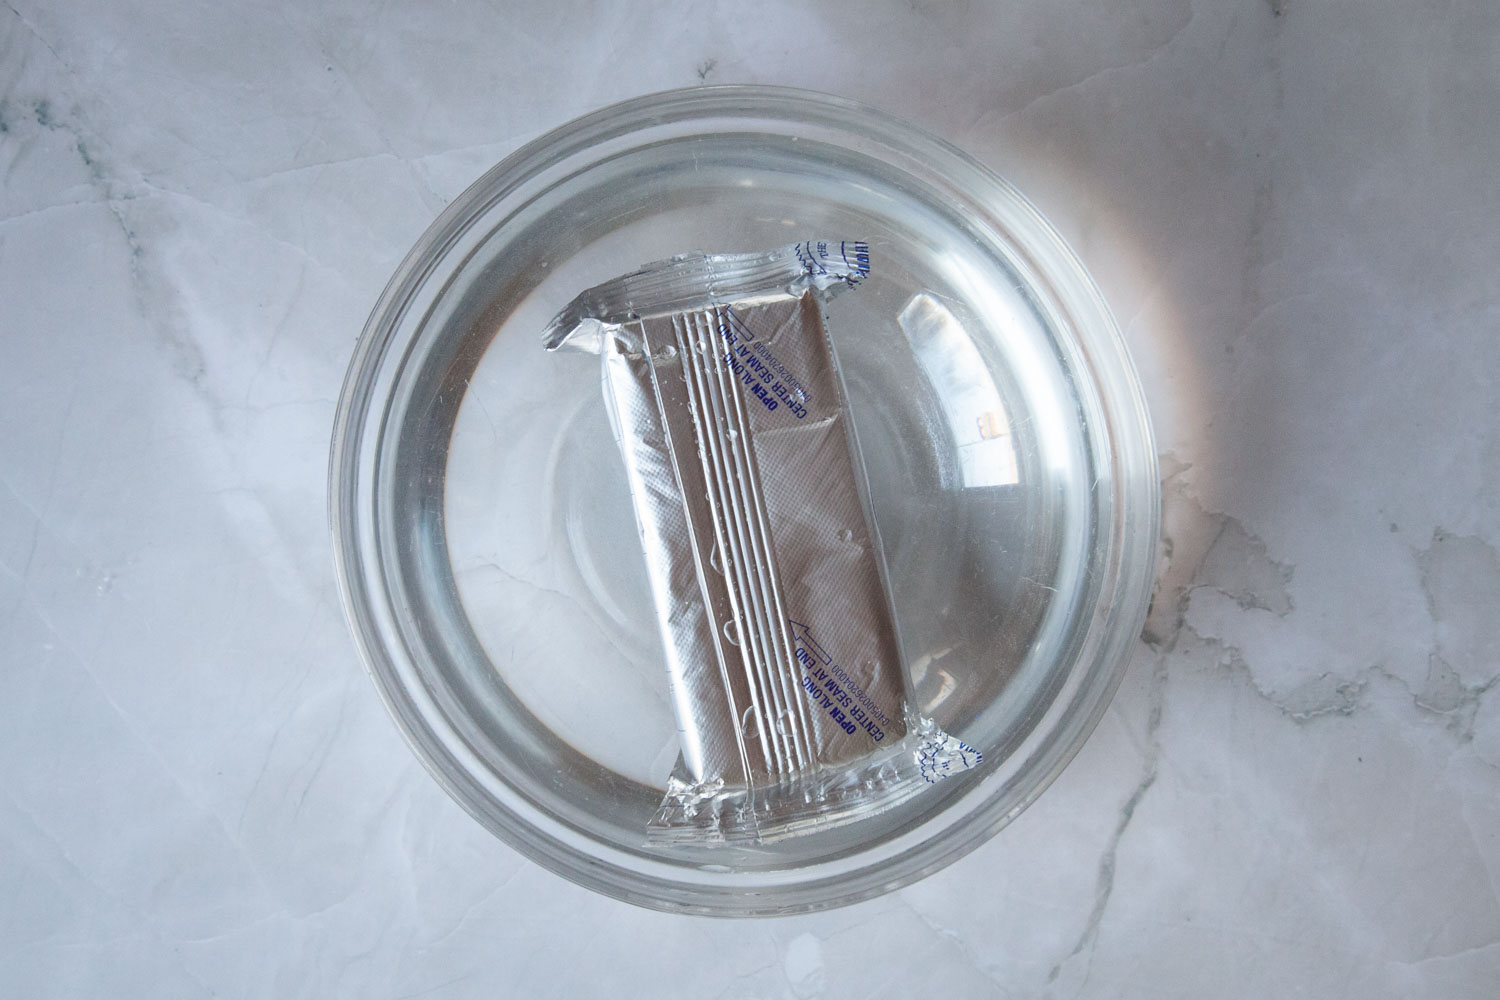
But if you’re like me, you don’t always have the forethought to do that! And though you can remove the cream cheese from the foil wrapper and microwave the cream cheese to warm it up, I have found that microwaving it can lead to uneven heating of the cream cheese, with pockets of super hot and refrigerator cold cream cheese.
My favorite way to warm up the cream cheese is to leave it in the foil and place it in hot water from the kitchen tap. Let the cream cheese sit for about 10 minutes in the hot water, which is about the time it takes to gather up all your ingredients, prep the muffin pan, and preheat the oven. The hot water will warm the cream cheese up to the right temperature.
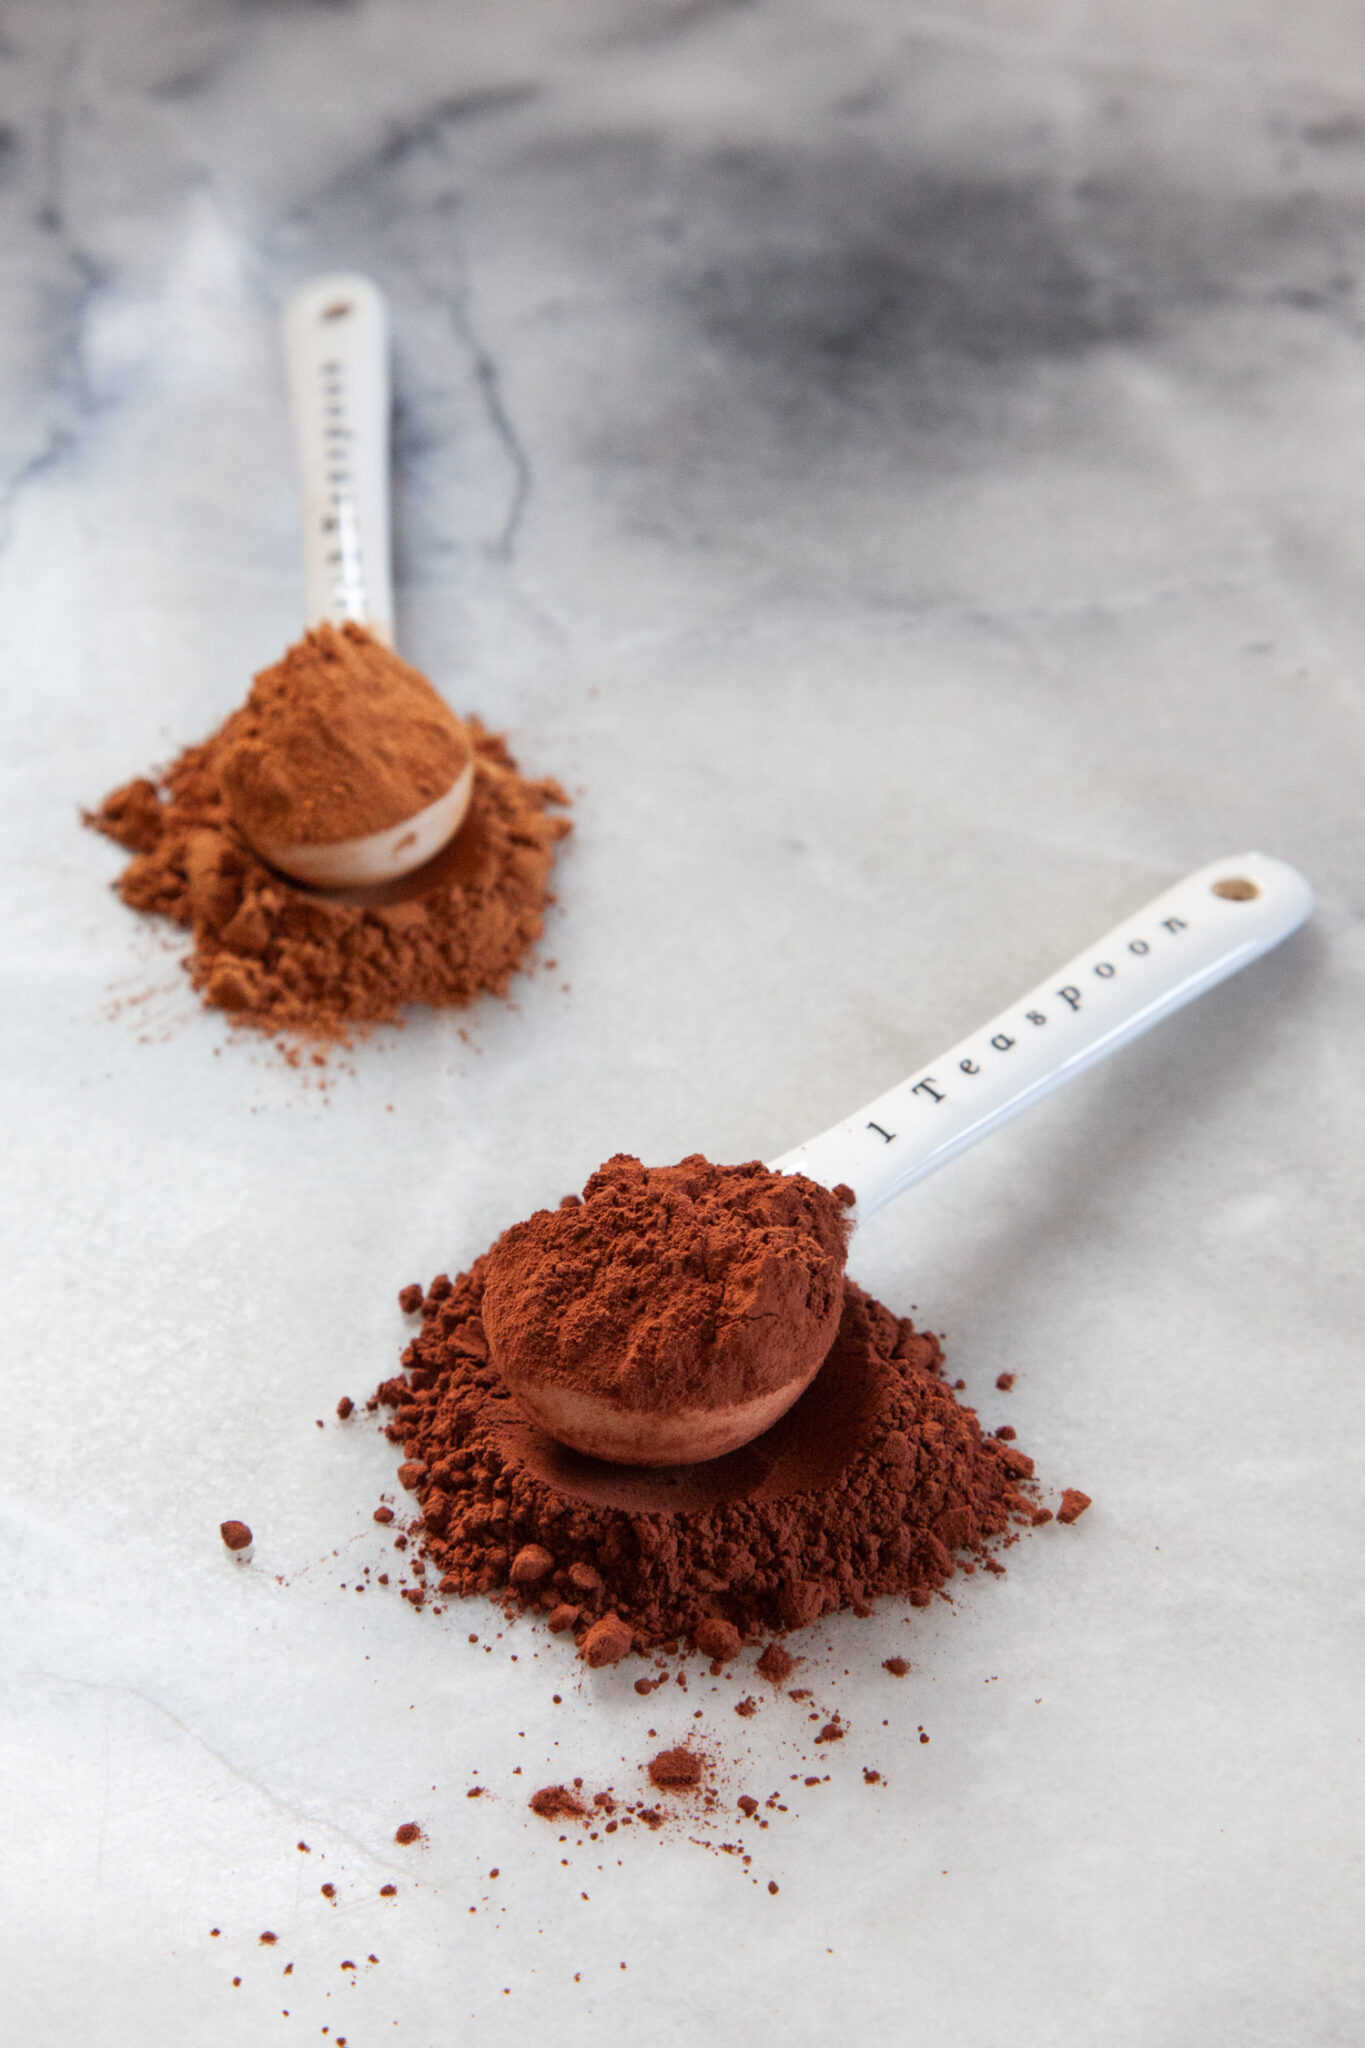
Using the right cocoa powder
This recipe uses natural cocoa powder, which is more acidic than Dutch-processed cocoa. Natural cocoa powder is necessary because the leavening in the cupcake is baking soda, which requires an acid in it. To boost the acidity, I also add Balsamic vinegar. If you only have Dutch-processed cocoa, you can substitute the same amount of that cocoa, but reduce the baking soda to 1/4 teaspoon and add in 2 teaspoons of baking powder as well.
Changes from the original recipe
I’ve adapted and changed this recipe from the original, which is in Lebovitz’ book, and which was most likely adapted from the 1961 Pillsbury 13 Grand National Bake-Off cookbook, by Mrs. Leonard E. Geisert (who was the Senior First Prize Winner). Lebovitz ups the cocoa powder to 5 tablespoons and uses light brown sugar in his recipe versus the Geisert recipe that uses 4 tablespoons of cocoa powder and white sugar.
I’ve kept Lebovitz’ 5 tablespoons of cocoa powder but also shifted the brown sugar to dark brown, to up the molasses flavor. I also increased the vanilla to 2 teaspoons and used coffee to boost the chocolate flavor over water, which both Lebovitz’ and Geisert’s recipe originally use.
Finally, the Geisert only lists “vinegar” in the recipe, while Lebovitz specifies white or cider vinegar. I swapped out Balsamic vinegar, which has a rich syrupy flavor that plays well with chocolate. I’ve found that white or cider vinegar work fine initially but any cupcakes that are leftover, the vinegar flavor becomes more pronounced. Balsamic vinegar doesn’t have this issue and it lends a richer flavor. If you only have white or apple cider vinegar, feel free to use that, just eat the cupcakes the same day you bake them, or know that leftover cupcakes might taste a tinge more acidic when you eat them.
How to store black bottomed cupcakes
These cupcakes have cream cheese, so I recommend storing the in the fridge if you have leftovers. Store them in an airtight container for up to 5 days. You can eat them straight from the fridge (they’re delightful cold!) or just set them on the counter for an hour to warm up to room temperature.
You can also freeze these cupcakes. Just place them on a baking sheet in the freezer for 2 hours. Once frozen solid, store them in a Ziploc bag or airtight container for up to 2 months. Thaw them on the countertop for a couple of hours or until they are at room temperature before serving.
If you like these Black Bottomed Cupcakes, check out these other chocolate recipes:
- Guinness Stout Chocolate Bundt Cake
- Double Chocolate Chip Muffins
- Chocolate Banana Bread
- Bakery-Style Chocolate Chip Cookies
- Hot Chocolate Cookies
- Chocolate Strawberry Cheesecake
- Chocolate Salted Caramel Stuffed Cookies
- Reverse Chocolate Chip Cookies (Pan Banging-style)
- Chocolate Pot de Creme with Olive Oil and Candied Kumquats
Black Bottomed Cupcakes
Ingredients
Cream cheese filling
- 8 ounces cream cheese at room temperature 225 g or 1 brick (see section above for how to bring cream cheese to room temperature quickly)
- 1/3 cup granulated sugar 65 g
- 1 large egg
- 1/3 cup mini chocolate chips 2 oz or 60 g, can use regular sized chocolate chips or chopped chocolate
Cupcake batter
- 1 1/2 cups all-purpose flour 210 g
- 5 tablespoons natural cocoa not Dutch-processed, 33 g (see section above for the difference between cocoa powders)
- 1 teaspoon baking soda
- 1/2 teaspoon kosher salt
- 1 cup coffee or 1 cup hot water with 1 teaspoon instant coffee or instant espresso powder
- 1 cup packed dark brown sugar 220 g
- 1/3 cup vegetable oil
- 1 tablespoon Balsamic vinegar can substitute apple cider or white vinegar (see section above about the vinegar)
- 2 teaspoons vanilla extract
To finish
- A handful of mini chocolate chips (optional, but why not?)
Instructions
-
Preheat the oven to 350°F. Butter or spray a nonstick muffin pan with cooking oil. You can also line it with cupcake liners if you wish.
Make the cream cheese filling by placing the cream cheese, sugar and egg in a small bowl. Beat ingredients together with a balloon whisk until smooth. Don’t stress if there are tiny lumps in the batter but beat until you can get it as smooth as possible. The warmer the cream cheese, the easier it is to get the batter smooth. See my section above for warming up cream cheese quickly.
-
Once the cream cheese filling is blended and smooth, fold in the chocolate chips.
-
Make the cupcake batter by placing the flour, cocoa, baking soda, and salt to a large bowl. Use a balloon whisk and vigorously stir together the dry ingredients until they are uniform in color.
-
Place the coffee, brown sugar, vegetable oil, balsamic vinegar, and vanilla extract in a medium bowl and whisk together. Pour the wet ingredients into the dry ingredients.
Whisk ingredients together until a smooth batter forms.

-
Divide the chocolate batter into the cupcake muffin cups. It should come up to about 2/3rd full in the cups. Then spoon a generous tablespoon of cream cheese filling into the middle of each cup of chocolate batter. You want to gentle dip the spoon of cream cheese into the middle of the chocolate batter, so it settles in a bit. Don’t just spoon it on top of the batter. This will fill the muffin tins almost to the top.
Sprinkle a few more mini chocolate chips on top if you want.
-
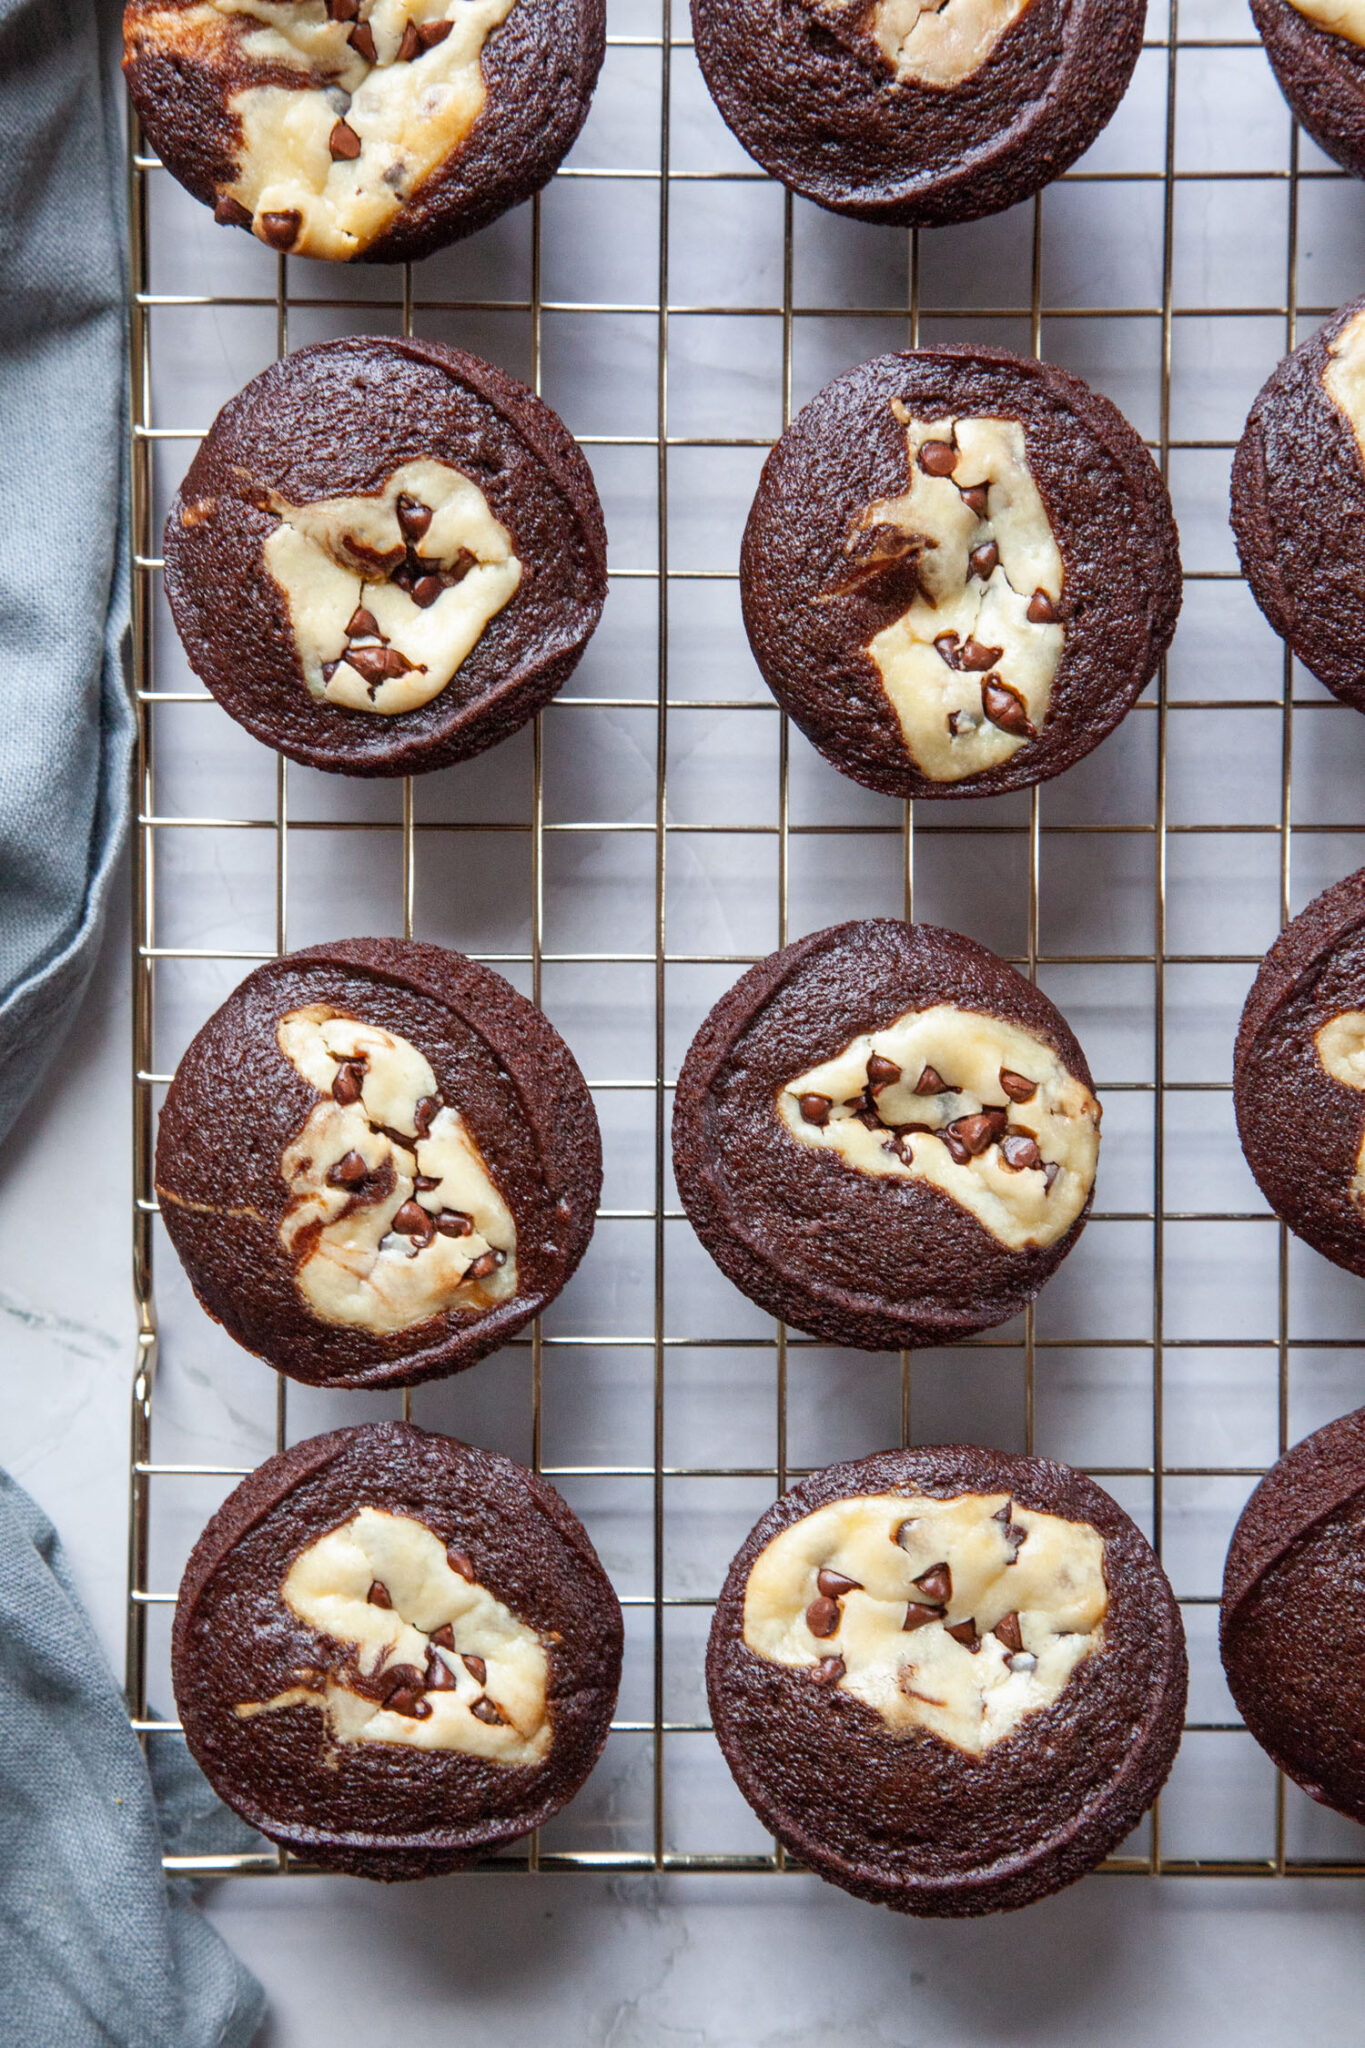
Bake the cupcakes for about 25 minutes, or until the cream cheese filling starts to look a bit golden brown and the tops of the cupcake is springy to the touch.
Let cool in the muffin pan, then twist and lift up each of the cupcakes and move them to a wire rack to cool completely.

Notes
Nutrition
Pin this recipe for later!

The post Black Bottomed Cupcakes appeared first on Eat The Love.


